Create and Burn a DVD from an ISO
Image file
If you're producing a DVD, and need to make multiple copies, or simply want to archive your DVD productions, consider outputting an ISO image file to your hard drive. That way, you have the secure archive, and you can easily burn additional copies of the DVD from that ISO image file.
To Create the ISO Image File:
You can create an ISO image file in two ways.
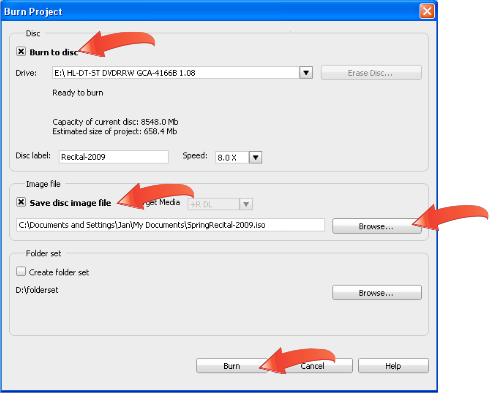
1. Create an ISO image file in MyDVD. In MyDVD, click the “Burn Project" button to open the Burn Project dialog. To burn a disc and create the ISO image file at the same time, check the "Burn to disc" checkbox, select the target disc drive and name the disc as normal. Then, click the "Save disc image file" checkbox. If desired, click “Browse” to change the Save to location, and then customize the file name for the ISO image file. Then click “Burn.” MyDVD will burn the disc and create the ISO image file
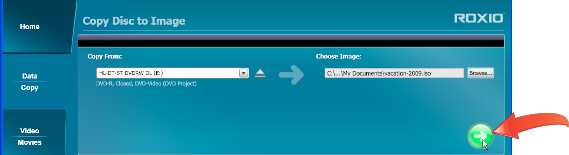
2. Create an ISO Image file from an existing DVD. If you already have a DVD that you'd
like to archive or copy, in Creator, click “Data/Copy,” and then “Copy Disc to Image.” The
Copy Disc to Image workspace opens.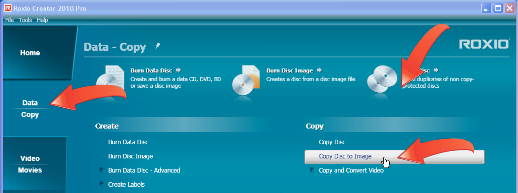
3. Customize the ISO Image file name and storage location. Click the “Browse” button to open the Save As dialog. Customize the ISO image file name, and choose the save to location. Click “Save” to close the Save As dialog.
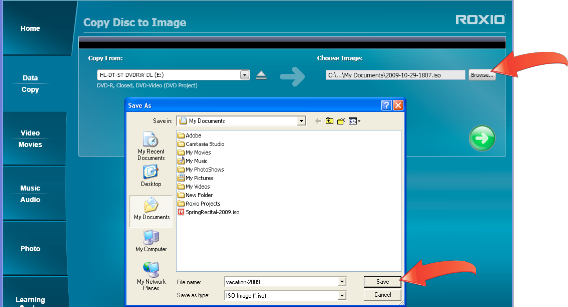
4. Save the ISO Image file. Click the green Go button to save the ISO image file.
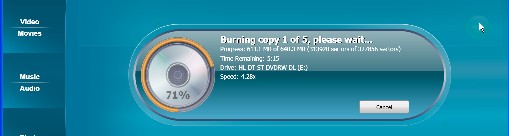
5. Creator saves the ISO image file. Creator displays this status window, which advises you of your progress, and will close once the ISO file is saved. If desired, click the “Cancel” button to stop saving the ISO Image file.

To Burn a DVD from an ISO Image File:
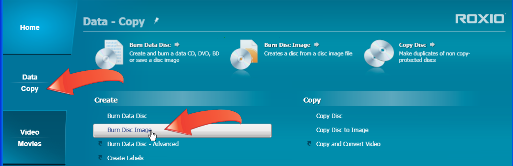
6. Open the Burn Disc Image Workspace. To burn an ISO image to a DVD, insert a blank DVD into your DVD recorder. Then, in Creator, click "Data/Copy," then "Burn Disc Image." The Burn Disc Image Workspace opens.
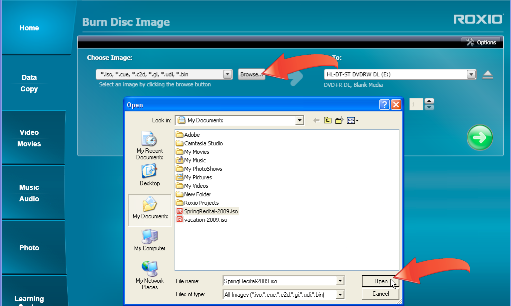
7. Choose the ISO Image file to Burn. Click “Browse” to open the Open dialog. Navigate to and click the target ISO image file, then click “Open.”
8. Start recording. To produce multiple copies, choose the number of copies, and then click Go to start recording.
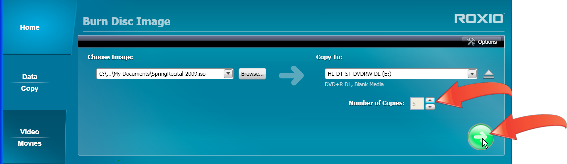
9. Insert additional discs as necessary. Creator will prompt you for additional discs as necessary to complete the desired quantity, and/or close the status message when completing all discs. If desired, click the “Cancel” button to stop recording any disc.